How to Adjust Diamond Texture Brightness with HDR in Maya?
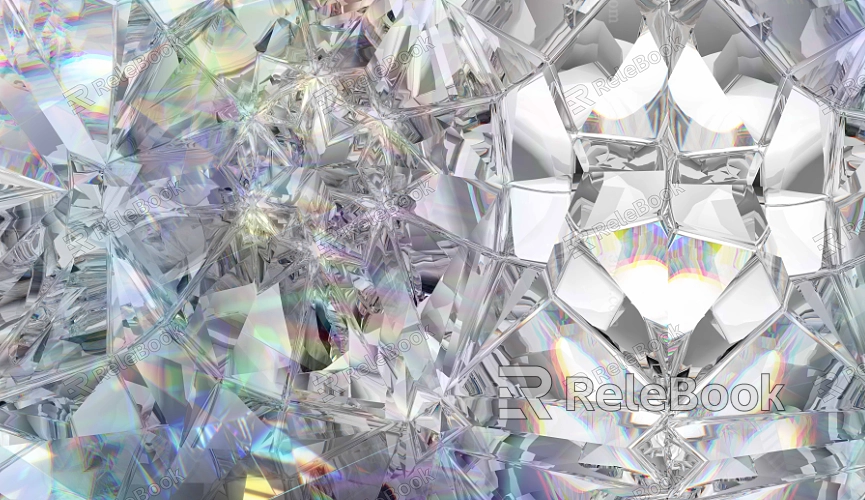
To showcase the unique sparkle and refraction of diamonds, HDR files are increasingly being used. Particularly when adjusting the brightness of diamond textures, HDR’s rich lighting data can make the light and shadow on the diamond surface more refined. However, many designers face challenges in effectively adjusting HDR brightness in Maya to optimize diamond textures. This article will provide a detailed guide on how to adjust the brightness of diamond textures using HDR in Maya, discussing the key steps involved to help you quickly master the process and enhance your rendering results.
1. Setting up the Scene and Diamond Model
Before adjusting HDR brightness, it's important to ensure that the scene and diamond model are properly set up.
Model Import and Material Assignment: Import your pre-modeled diamond and ensure that its shape and optical properties meet the project’s requirements. Typically, a diamond material should have a high refractive index and strong reflective qualities. In Maya, the Arnold renderer's AI Standard Surface material is ideal for diamonds.
Scene Lighting Setup: HDR files are commonly used for environment lighting in Maya. To adjust the brightness of a diamond texture, you must first load an HDR file into the scene’s lighting settings. You can apply the HDR file using Arnold’s Skydome Light, which allows for direct use of the file as the scene’s primary light source.
2. Choosing the Right HDR File
The quality and content of your HDR file will directly impact how the diamond is portrayed, so selecting the right file is crucial.
Selecting Appropriate Environment Lighting: The brightness and reflective properties of the diamond surface are closely tied to environmental lighting. Choose an HDR file that offers rich light variation, such as those with sunlight, shadows, and reflections, to best showcase the diamond’s optical properties.
HDR Resolution and Dynamic Range: High-resolution HDR files provide more detail, allowing the diamond’s light and shadow interplay to appear more realistic. Additionally, a greater dynamic range gives more flexibility in brightness adjustments, improving the overall rendering quality.
3. Adjusting HDR Brightness
To control the brightness of the diamond texture in Maya, you can directly adjust the intensity of the HDR lighting.
Using the Exposure Parameter: In Maya's Arnold render settings, you can adjust the overall brightness of the HDR file using the Exposure setting in the Skydome Light. Increasing the exposure will make the diamond surface appear brighter, while reducing it helps prevent overexposure.
Brightness Curves and Gamma Settings: Adjustments to the HDR brightness aren't limited to exposure alone. You can also tweak the Gamma value, which influences the midtone brightness. This allows for fine-tuning of the diamond texture's light and dark contrast, making the effects appear more natural.
4. Controlling Reflection and Refraction
The diamond’s brightness is not solely dependent on the HDR file but also requires appropriate control of reflection and refraction settings.
Reflection Intensity Adjustment: By adjusting the Reflectivity parameter in the material settings, you can fine-tune the diamond’s glossiness. Excessive reflection may cause the surface to appear too shiny, while lower reflection can diminish its visual appeal.
Setting the Refractive Index: The refractive index (IOR) for diamonds is typically around 2.42 and is a critical parameter for achieving realistic light behavior. Properly setting the refractive index will allow light to refract and reflect within the diamond, enhancing its brightness and sparkle.
5. Rendering Tests and Optimization
After making initial HDR brightness adjustments and setting up the material, conducting render tests is essential for verifying the results.
Testing with Different Lighting Conditions: Experimenting with various HDR files or changing the scene’s light direction can help you observe how the diamond reacts to different lighting setups. Render tests are particularly useful for identifying brightness issues in highlights and shadows.
Optimizing Render Settings: To improve the rendering quality, adjust settings such as the Anti-Aliasing (AA) value or increase the Ray Depth in the Arnold renderer. These adjustments ensure clearer and more realistic details in the diamond’s lighting and shading.
6. Post-Processing
Once the rendering is complete, post-processing can further enhance the diamond’s brightness and overall visual effect.
Adjusting Brightness and Contrast: Using Maya's built-in render view or external post-production software like Photoshop or After Effects, you can fine-tune the brightness and contrast of the rendered image. This method allows for additional refinement without significantly affecting render times.
Color Correction: If the diamond’s color or brightness is overly influenced by environmental lighting during the rendering process, color correction tools can be used to restore the desired appearance, ensuring the final output aligns with design expectations.
7. Saving and Output
After completing all adjustments, it’s important to save your final HDR settings and render outputs properly.
Saving HDR Settings: To streamline future projects, save the current HDR lighting setup as a preset. This not only saves time but also ensures consistency across similar scenes.
Choosing the Right Output Format: Selecting an appropriate output format is key. EXR is often recommended for its ability to retain a wide dynamic range, allowing for further adjustments in post-processing.
By following these steps, designers can effectively use HDR to adjust the brightness of diamond textures in Maya, resulting in more realistic and visually striking renderings. This method is not limited to diamonds but can be applied to other highly reflective materials as well.
If you’re looking for high-quality HDR images, 3D textures, SketchUp models, or 3ds Max models to create models and virtual environments, Relebook offers a wide range of resources to help you achieve exceptional visual results in your projects.
